


Blog / Parts And Service

Toyota Camry Oil Change Guide

blue-toyota-camry

As the proud owner of a Toyota Camry, you can seek maintenance services for your vehicle to preserve its condition. Along with services like fluid replenishments and tire rotations, oil changes are essential to your car's operation. Below, you can review our Toyota Camry oil change guide so you can complete or obtain this important service.

What Kind of Oil Does a Toyota Camry Take?

Most Camrys accept 0W-16 or 0W-20 motor oil. However, it's important to confirm the oil type that your owner's manual suggests. If you don't have access to your vehicle's manual or would like further confirmation, you can seek guidance from our service center at Keith Pierson Toyota. We'll help you get the right kind of oil for your vehicle so it can operate at its prime.

When Does the Toyota Camry Need an Oil Change?

The Toyota Camry typically requires an oil change every six months or every 5,000 miles that you put on your odometer. Follow an oil change schedule for whichever event comes first. You may be able to follow an extended oil change schedule for your Camry if it takes synthetic oil. This schedule would be approximately every year or every 10,000 miles.

Sometimes, you may need to get an oil change for your Camry more frequently. For example, some signs that you need an oil change include smoke coming from the exhaust, a locking sound coming from your engine, or vibrations when idling. You can check your oil levels and oil texture using the dipstick that comes with your vehicle. If you notice low oil levels or oil that's too thick or thin to flow properly through your engine, you can change your oil even if it's not technically due for this service.

Why Is It Important To Change the Oil in Your Toyota Camry?

Motor oil that's the right consistency is essential for a properly functioning engine. It lubricates the many moving parts of your engine and prevents them from scraping against one another. It also reduces friction and prevents the likelihood of the engine overheating. When your Camry can operate on fresh oil, it may experience greater fuel efficiency and protect the life span of your engine for the long term.

What's the Difference Between Conventional and Synthetic Oil?

Depending on the age of your Camry, it may take conventional oil. Conventional oil is most prevalent in older Camry models. It comes from refined crude oil, and its thick composition helps it protect and lubricate older engines more thoroughly. Synthetic oil is most prevalent in newer Camry models. It comes from man-made chemical compounds, is thinner than conventional oil, and can flow better throughout the crevices of newer engines.

How To Change the Oil in Your Toyota Camry

The process for changing the oil in your Camry is similar to how you'd do it for any other vehicle. Follow these steps to complete this service yourself:

Gather Your Supplies

Begin by gathering your supplies, which include rags, a new oil filter, a wrench, an oil collection pan, a funnel, and new oil. Refer to the owner's manual of your specific Camry model to learn how many quarts you'll need. You can also acquire a method for lifting your vehicle so you have room underneath to work. Some people may use car ramps and wooden blocks, while others may use a car jack and jack stands.

Lift Your Camry

Lift your Camry with your chosen method. If you use car ramps, drive up them slowly so you can position the car perfectly without rolling over the edge of the ramp. Place a wooden block behind each rear wheel to prevent your Camry from rolling backward while you're working on it.

If you use a car jack, lift it to the lifting point that your owner's manual specifies. Once you achieve the right height with your car jack, you can place two jack stands underneath your Camry as a safety precaution.

Open Your Camry's Hood

Open your Camry's hood and keep it open using the hood prop rod. Find the engine oil cap and unscrew it. This will help the oil flow out faster when you remove the drain plug in the next step.

Set Up Your Oil Pan and Drain the Old Oil

Go underneath the car to position the oil pan underneath the drain plug. Ideally, you can change the oil with another person present so they can ensure your safety when you're underneath the vehicle. Locate the drain plug and use a wrench to loosen it. Allow the oil to drain out, which is a process that usually takes five to 10 minutes.

It may come out quickly at first, and the flow may start to slow down as time goes on. Prepare to adjust the oil pan as necessary, and be mindful of warm oil if the engine was recently running. Replace the drain plug when all the oil has come out.

Replace the Old Filter

Locate your car's engine filter, which is usually on the engine bay's passenger side. Use a wrench and the appropriate socket size to remove the filter. Clean the filter's housing unit before installing the new one. Secure the new filter in place by tightening it by hand. You can use your wrench to further tighten it, but be careful not to overtighten it.

Refill the Engine Oil

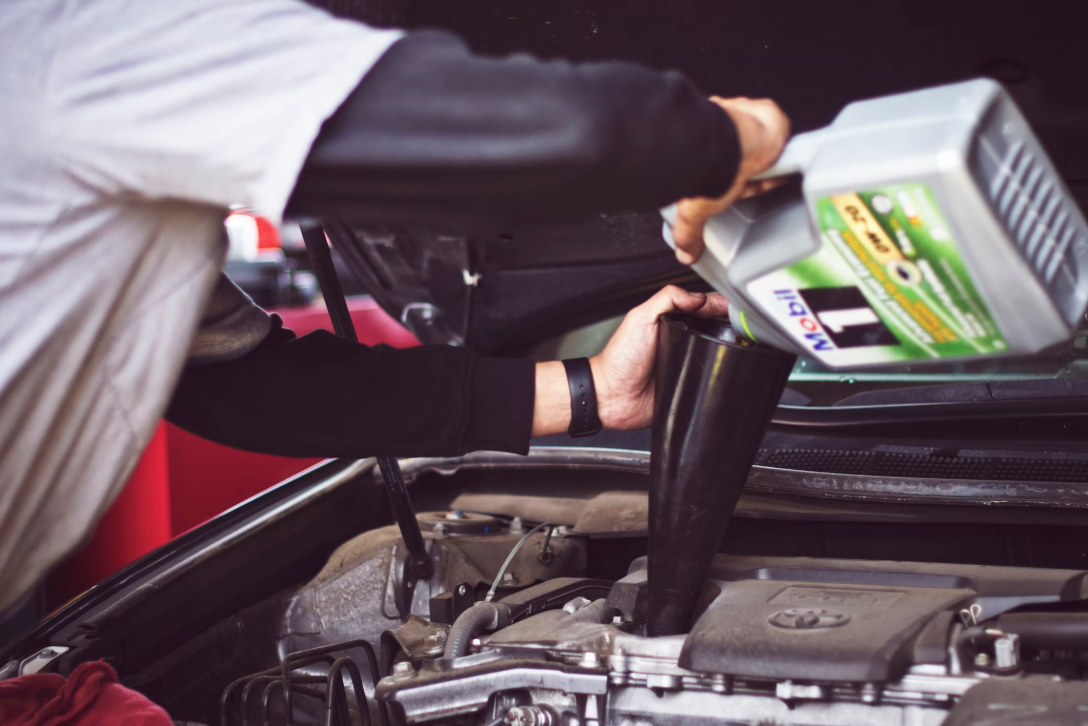
Place your funnel into the engine oil opening. Pour the motor oil into the funnel slowly so you don't drip oil on other parts of the engine bay. Use multiple bottles if necessary, ensuring that you follow your vehicle's quart requirements.

Confirm the Proper Oil Levels

Use your car's dipstick to confirm that you've poured in enough oil. Screw the engine oil cap back on by hand, and use a rag to clean any spilled oil. Turn your vehicle on and conduct an oil pressure test to confirm your oil reaches the proper level. Finally, turn your engine off and close your car's hood.

Schedule an Oil Change for Your Toyota Camry Today

If you don't have the time or desire to take on your Camry's oil change yourself, you can bring it to our service center at Keith Pierson Toyota. Schedule an appointment with us today so you can book this essential service. While you're here, our certified service technicians can perform other services, including brake and battery checks.

Image via toyota.com
Posted in:

Related Posts

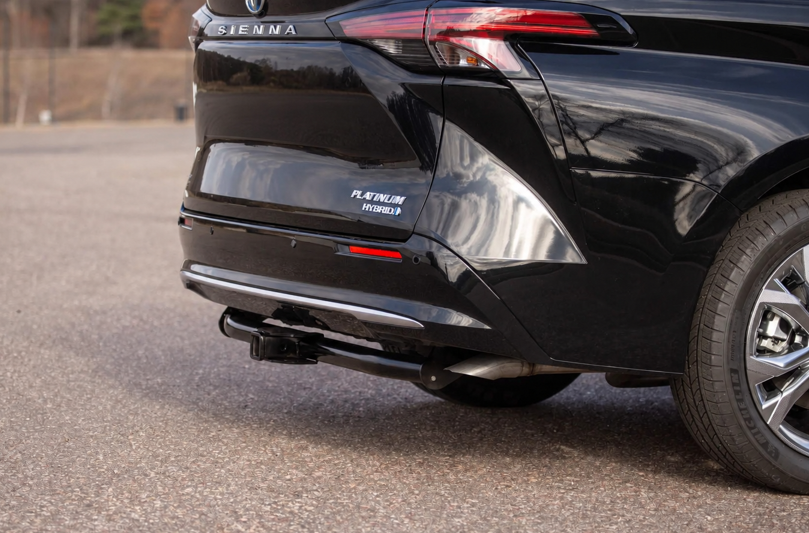
Toyota Sienna rear tow hitch accessory close-up

Toyota Sienna Tow Package and Accessories: What to Know Before Your Next Trip

Planning a camping trip to the springs near St. Augustine or hauling a boat down to a Jacksonville-area ramp? Before you hitch up, it helps to know that not every Toyota Sienna is factory-ready to tow. Tow readiness varies quite a bit by trim, and knowing those differences now can save you a headache later. Our team at Keith Pierson Toyota is happy to talk through which Sienna trim fits your towing needs. Understanding the 2026 Toyota Sienna Tow Package There's no single, universal tow package that applies across every Sienna trim. For the 2026 model year, Toyota builds one trim, the Woodland Edition, with a hitch and wiring already in place. Every other trim relies on accessories added after the fact, so the towing capacity you see advertised often assumes the right equipment is already installed, and that's not the case across the lineup. What's Standard on the Woodland Edition The Woodland Edition comes with a factory towing hitch receiver and wiring harness with a 4-pin connector, and the Sienna is rated to tow up to 3,500 lbs when properly equipped. It also includes standard AWD, which adds confidence when hauling a trailer on wet pavement or a boat ramp, plus 6.9 inches of ground clearance, six-tenths of an inch more than the 6.3 inches on other trims, useful for uneven terrain at a campsite or unpaved lot. Inside, the Woodland Edition seats seven, with SofTex-trimmed sport second-row captain's chairs with a super-long-slide feature for extra legroom. A standard 1500W inverter with two 120V AC outlets lets you run small equipment or charge gear without adding an inverter, and it's optional on most other trims. Black roof rails, 18-inch dark-finished alloy wheels, and a 12.3-inch Toyota Audio Multimedia system round out the package. The trim comes in Ice Cap, Cypress, Cement, or Midnight Black Metallic. Why Other Trims Need Dealer-Installed Accessories LE, XLE, XSE, Limited, and Platinum trims don't come with a hitch or trailer wiring from the factory. If you want to tow with one of these, you'll need to add the right components through a dealer. Toyota does not recommend towing without a properly installed hitch and wiring setup. Toyota Sienna Towing Accessories Explained For trims outside the Woodland Edition, towing capability comes together through a handful of separate accessories rather than one bundled kit. Knowing what each piece does makes it easier to have an informed conversation with a parts specialist. Trailer Hitch Receivers and Wiring Harnesses The core accessory is the Tow Hitch Converter Assembly, which provides the receiver where a ball mount attaches. Alongside it, a Towing Wire Harness, a 4-pin connector, powers the trailer's lighting so it communicates properly with traffic around you. Dual Port Covers protect any connectors that aren't in use, keeping moisture and debris out when you're not towing. Ball Mounts and Electrical Connectors The ball mount and trailer ball are sold separately from the hitch itself, so they need to be added to complete the setup. Getting the connectors matched correctly matters more than it might seem. Genuine Toyota wire harness installation is designed to preserve the vehicle's electrical system integrity, while some aftermarket wiring systems can compromise it over time. There's also a structural difference worth knowing about. Genuine Toyota hitch hardware uses up to 16 frame connection points, compared to fewer than 6 on many typical aftermarket hitches, and that spreads towing stress more evenly across the body structure. Genuine hitches also use a no-drill installation that preserves frame integrity, whereas aftermarket drilling can introduce rust or stress points over time. If you're sourcing accessories, our parts department can help match the right components to your specific Sienna trim. The Woodland Edition ships ready to tow, rated by Toyota up to 3,500 lbs, while LE, XLE, XSE, Limited, and Platinum trims need a Tow Hitch Converter Assembly, wiring harness, ball mount, and trailer ball added separately. Within that 3,500-lb ceiling, common loads include small utility trailers, pop-up campers, personal watercraft, and small boats, the kinds of things many Jacksonville-area families haul to nearby lakes or coastal launch points. Weight Considerations Before You Tow Weight limits aren't just a technicality. They affect how your Sienna performs with a trailer attached, including handling and braking, so none of the figures below should be estimated. Cargo and Passenger Weight Limits Total load capacity is the combined weight of passengers, cargo, added equipment, and trailer tongue weight your Sienna can carry. It's the difference between curb weight and the vehicle's gross vehicle weight rating, not curb weight plus payload. On the 2026 XSE specifically, curb weight (the vehicle's weight with standard equipment and no passengers or cargo) is 4,675 lbs, seating capacity is 7, and cargo volume runs 33.5 cu.ft. behind the third row, 75.2 cu.ft. behind the second row, and 101.0 cu.ft. behind the first row. Curb weights range from 4,610 lbs on the LE to 4,725 lbs on the Limited and Platinum, so figures for one trim shouldn't be assumed for others. For your specific Sienna, check the doorjamb sticker and the owner's manual for exact figures, since passenger count and optional equipment both affect available capacity. Gross trailer weight should never exceed 3,500 lbs, and your Sienna's specific 2WD GCWR (gross combined weight rating, meaning the total weight of the vehicle, passengers, cargo, and trailer combined) can be confirmed in your owner's manual or on your vehicle's certification label. Understanding Tongue Weight Tongue weight is the downward force the trailer's coupler places on the hitch. The Sienna's maximum tongue weight is 350 lbs, which is 10 percent of its 3,500-lb tow rating. Tow-savvy drivers often aim for 10 to 15 percent of total trailer weight, but that's a general guideline, and on a Sienna the 350-lb ceiling comes first: a 3,000-lb trailer loaded to 15 percent would put 450 lbs on the hitch, well past the limit. Remember that tongue weight counts against your payload, along with passengers and cargo. Since too little or too much tongue weight makes a trailer harder to control at speed, check the loaded tongue weight on a scale rather than estimating it. Preparing Your Sienna's Systems for Towing Getting your Sienna road-ready involves more than hooking up a trailer. A few system checks make a real difference in how the vehicle performs under load, especially on longer hauls. Cooling System and Speed Considerations Towing raises cooling demands on any vehicle, since the engine works harder to move additional weight. Your owner's manual includes guidance on managing engine heat while towing, so it's worth reviewing the section specific to your model year before a long trip, particularly if you're heading out in Florida's summer heat. Toyota also recommends a maximum towing speed of 65 mph on flat, dry, straight roads, and you should never exceed posted limits or your trailer's rated speed, since sway instability increases as speed climbs. Pre-Trip Checklist Tire pressure checked on both vehicle and trailer, matched to the trailer manufacturer's spec. Mirrors adjusted or upgraded for a clear view of the trailer and surrounding lanes. Total load weight confirmed against your Sienna's rated capacity. Planned towing speed kept at or below 65 mph on suitable roads. Our service team can walk through these checks with you if you'd rather have a professional set of eyes on the setup before a trip. Confirming Your Sienna's Towing Setup Even with the right accessories installed, it's worth double-checking everything before you head out, especially if you're towing near your Sienna's rated limit. Checking Your Owner's Manual and Trim Specifications Your owner's manual lists the towing specifications for your specific trim and model year, and it's the most reliable reference for your exact vehicle. Since figures like GCWR, tire inflation, and mirror requirements can shift between model years, always verify against your own printed manual rather than relying on general figures alone. Why Professional Verification Matters Factory option content can reduce a Sienna's towing capacity, so it's worth having a Toyota Parts Professional confirm your setup rather than assuming your configuration matches published figures. This matters whether you're researching Sienna towing capacity for the first time or you've towed with a previous Sienna and want to confirm this year's specs. Get Toyota-Compatible Towing Accessories at Keith Pierson Toyota If you're outfitting a Sienna for towing or just confirming what your current setup can handle, our team in Jacksonville is ready to help with genuine parts and proper installation. Genuine Parts, Properly Sourced Our parts department helps Jacksonville-area drivers find accessories that match their exact Sienna trim, whether it's a wiring harness, hitch receiver, or ball mount. Choosing Toyota Genuine Parts over generic aftermarket options helps protect your vehicle's frame and electrical system long term. Certified Installation You Can Trust Our technicians install towing accessories correctly the first time, which matters for both safety and long-term reliability. Rather than guessing at compatibility, our team confirms what your specific Sienna needs before any work begins. Schedule Your Visit We serve drivers throughout Jacksonville, Orange Park, Middleburg, Fleming Island, Jacksonville Beach, and surrounding North Florida communities. If you're planning a trip to a nearby lake or campground within an hour's drive, schedule a pre-trip inspection with us first. Reach our parts team at 866-706-4236, stop by 6501 Youngerman Circle in Jacksonville, or schedule towing setup service online, and we'll help make sure your Sienna is ready for the road ahead.

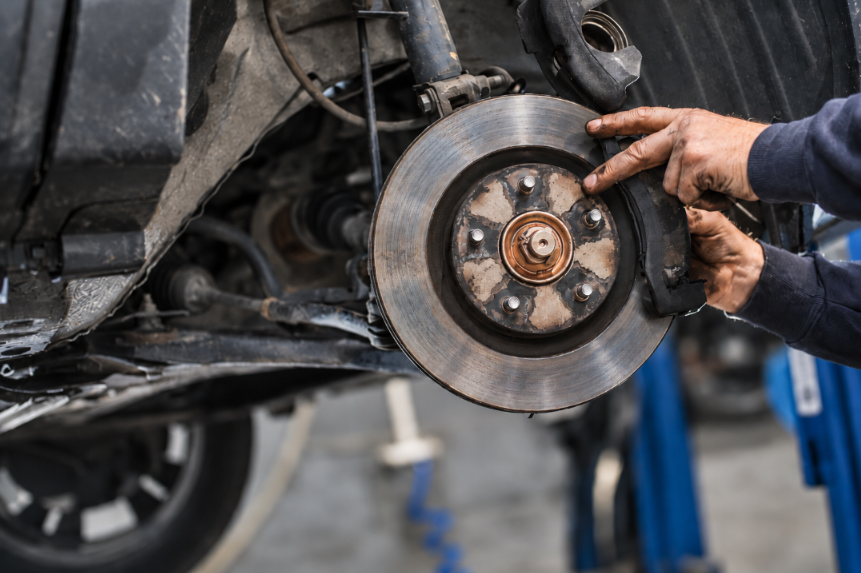
Technician inspecting brake rotor during vehicle service

Brake Rotor Cleaner: Essential for Maintaining Your Toyota's Brakes in Jacksonville

Jacksonville drivers deal with heavy rain, coastal humidity, and salt air that quietly work against a vehicle's braking system. Rotors and pads here collect dust and grime faster than they would in a drier climate, so small maintenance habits go a long way. Brake rotor cleaner plays a bigger role in that upkeep than many owners expect, and understanding how it works can help you recognize when your Toyota needs professional attention. If you notice anything unusual with your brakes, our Toyota brake service and repair team is ready to take a closer look. What Is Brake Rotor Cleaner and Why It Matters Brake rotor cleaner is a solvent-based product formulated to strip grease, oil, brake fluid, and built-up brake dust from rotors, calipers, pads, and drums. It's a specialized brake parts cleaner rather than a general-purpose degreaser, and mixing the two up can cause real problems down the line. The formula evaporates quickly and leaves no residue behind, keeping the pad-to-rotor contact surface clean for consistent stopping power. Most brake and rotor cleaner products are non-conductive, so they're generally safe to use around basic electrical connectors, but they can still damage sensitive sensors near the braking system, such as wheel speed sensors, so overspray should be kept away from those components. They are also not safe for plastic components. Overspray on plastic housings, trim, or wiring covers can soften or degrade the material over time, so careless application can create new problems while solving old ones. How Brake Cleaner Removes Dust, Grime, and Corrosion The solvent breaks down oils, grease, and stubborn residue first. Then the high-pressure spray physically dislodges debris from tight spots like caliper brackets and rotor vents, areas that are hard to reach with a rag or brush alone. Finally, rapid evaporation leaves the surface dry and residue-free, which is what proper pad-to-rotor contact requires. Brake dust isn't harmless. It's a mix of friction material and fine metal shavings, and that particulate can pose respiratory concerns if inhaled in significant amounts over time. Letting that buildup sit on rotors and calipers doesn't just create a housekeeping issue; it can measurably reduce braking effectiveness. Brake Rotor Cleaner vs. General Brake Cleaner Brake rotor cleaner and general brake system cleaning products often overlap, but rotor-specific formulas are tuned to handle the contaminants unique to rotors, pads, and calipers. Never substitute something like carb cleaner for a proper brake and rotor cleaner. Carb cleaner tends to leave a residue that interferes with braking friction and can cause pads to grab unevenly, the opposite of what you want from a cleaning product. Why Clean Brake Components Are Critical to Safe Stopping Clean rotors and pads aren't just about appearance. They directly affect how quickly and predictably your Toyota stops, especially in wet Jacksonville conditions where every bit of friction counts. Brake Dust, Road Grime, and Heat Exposure As brake dust and road grime accumulate, they create a layer between the pad and rotor that interferes with the friction needed for effective braking. Add in the heat generated during hard stops, and you get hot spots where the rotor's metal expands unevenly. That uneven expansion is a common source of vibration and noise, and over time it shortens the life of both pads and rotors. Moisture and Corrosion on Rotor Surfaces Steel and cast-iron rotors rust when exposed to rain, dew, or humidity, a near-daily reality across Jacksonville, Orange Park, Middleburg, Fleming Island, and Jacksonville Beach. A thin layer of surface rust is completely normal; it typically wipes away within the first few moments of driving as the pads scrub the surface clean. Problems start when a vehicle sits idle for extended periods, especially in coastal parking spots exposed to salt air. Prolonged inactivity allows pitting to form, and deep pits can lead to noise, vibration, and early wear that eventually turns into warping. If you notice heavier rust after a stretch of heavy rain or a long weekend of coastal parking, it's worth having the system checked before minor surface rust turns into something deeper. Never apply oils, waxes, sealants, or lubricants to a rotor's friction surface. Doing so compromises braking performance and often introduces the exact noise and vibration issues you were trying to avoid. Signs Your Toyota's Brakes Need Inspection or Service Your Toyota often gives early warning signs before a braking issue becomes serious. Knowing what to listen and feel for can help you get ahead of a problem. Brake Noise and Squealing A quick squeal after a rainy morning is normal, just surface rust getting cleared off by regular driving. Persistent squealing or grinding, especially at low speeds, tells a different story and usually points to worn pads or an uneven rotor surface. Abnormal, ongoing noise is one of the clearest signals that pads are wearing thin and need a professional look. Vibration or Pulsation When Braking A shudder felt through the steering wheel or throughout the car usually means the pads are grabbing unevenly against the rotor surface. Drivers often call this "warping," but technically it's thickness variation across the rotor. Vibration alone doesn't automatically confirm a warped rotor; there are several possible causes, which is exactly why a professional diagnosis beats guessing based on feel alone. Uneven Pad Wear and Reduced Stopping Performance When a rotor spins unevenly, the pads riding against it wear unevenly too, which compounds vibration issues over time. Heavy rust can also thin a rotor below its minimum thickness specification, reducing its ability to dissipate heat and handle repeated stops. If it's taking longer to stop than it used to, don't wait. Reduced stopping power is a safety issue, and getting your Toyota inspected as soon as possible is the right move. Why Brake Cleaner Should Be Used with Caution Brake rotor cleaner is a genuinely useful product, but it's also an industrial solvent that demands respect. Certain formulations, when exposed to high heat from welding, sparks, or a hot exhaust, can break down into phosgene gas. Manufacturer safety data sheets for these products typically flag them as extremely flammable and pressurized, so brake cleaner should never be sprayed near an open flame, running engine, or hot exhaust component. Those same SDS documents note that these products can be harmful or fatal if swallowed, pose an aspiration hazard, and can cause nervous system depression from prolonged vapor exposure. Anyone using brake cleaner should do so only for its intended purpose, in a well-ventilated space, wearing gloves and a mask. It's also worth knowing that the EPA has finalized rules restricting trichloroethylene and PCE in chlorinated brake cleaners due to their carcinogen classification, which has shifted many formulations toward non-chlorinated alternatives. Risks of Improper Use on Rotors and Pads Only products labeled safe for brake friction surfaces should ever touch pads or rotors. Using the wrong solvent, or applying the right one incorrectly, can damage sensitive sensors near the braking system (such as wheel speed sensors), degrade rubber seals, damage plastic components through overspray, or leave a residue that undermines braking performance rather than improving it. When in doubt about which product or method is appropriate for your vehicle, ask a trained technician instead of experimenting on your own. Why Rotor and Brake Diagnosis Belongs to Trained Technicians Cleaning a rotor is one thing. Diagnosing why it's rusted, pitted, or vibrating is a different task entirely, and it requires training, experience, and the right equipment. The Dangers of DIY Brake Disassembly An improperly installed pad can create uneven pressure across the rotor, leading to accelerated wear and a repair bill larger than if the job had been done correctly the first time. Incorrect reassembly or a missed underlying issue can lead to brake failure, endangering the driver and everyone else on the road. If you notice warping, pitting, or vibration, or you're simply unsure what's causing a symptom, the safest step is scheduling a professional inspection rather than attempting rotor work yourself. What a Professional Brake Inspection Covers A thorough inspection goes well beyond glancing at pad thickness. Technicians check calipers, brake hoses, slide pins, caliper boots, fluid condition, and pad carriers, and they measure whether a rotor can be resurfaced or needs replacement. Best practice is to have your braking system inspected roughly every six months, since problems with calipers or fluid often develop well before pads show obvious wear. Our ASE-certified technicians handle everything from routine inspections to more complex repairs, and if it's been a while since your last checkup, now's a good time to schedule brake service in Jacksonville. Call a professional rather than wait if you notice any of these: Deep pitting on the rotor surface that doesn't clear up with normal driving. Vibration or pulsation that suggests warping or thickness variation. Rotors measuring close to or below minimum thickness specifications. Noticeably reduced stopping power or longer stopping distances. Toyota Brake Pad and Rotor Service at Keith Pierson Toyota Our service team provides a full range of brake services for Toyota vehicles, using Genuine Toyota parts, pads, calipers, rotors, drums, and shoes included, all built to original equipment standards. That means the parts installed on your vehicle match what Toyota-designed rotors and components were engineered to work with, rather than a generic aftermarket substitute. We work on vehicles from across Jacksonville, Orange Park, Middleburg, Fleming Island, Jacksonville Beach, and the surrounding North Florida area, and our technicians understand how the region's humidity and coastal exposure affect brake components differently than drier inland climates. Schedule Your Brake Service in Jacksonville Today Brake maintenance isn't something to put off, especially in a climate where rust and humidity accelerate wear on rotors and hardware. Why Drivers Choose Us ASE-certified technicians who diagnose beyond just pad thickness Genuine Toyota parts built to original equipment standards Local expertise in how North Florida's coastal conditions affect brakes Ready to Book? If you've noticed noise, vibration, or reduced stopping power, don't wait for the problem to get worse. Schedule service with our team today, or contact us with any questions about what your Toyota's brakes may need.

man refilling motor oil on car engine bay

How Does My Engine Oil Get Dirty Fast?

Every day, customers visit our Keith Pierson Toyota service center in Jacksonville, Florida, with questions about their vehicle's performance, but one inquiry stands out: "How does my engine oil get dirty?" The answer to this simple question reveals a fascinating journey of automotive science and engineering. Most drivers see engine oil as another maintenance item, something we change periodically and forget about. But we see it differently. At Keith Pierson Toyota, we understand that engine oil is the lifeblood of your vehicle, working to keep your engine running smoothly. It's constantly battling extreme temperatures, microscopic debris, combustion byproducts, and the wear and tear of daily driving. Let's discover why engine oil gets dirty, what those color changes mean, and how you can protect your Toyota's engine for years to come. Are you ready to become an engine oil expert? Why Engine Oil Turns Black: The Science Behind the Grime Motor oil isn't just a lubricant — it's your engine's superhero. When the oil becomes dirty, it's doing what it's designed to do. The detergents in your motor oil are working overtime to clean up soot, carbon deposits, and various contaminants that naturally accumulate in your engine. The Cleaning Process Explained Engine oil is constantly collecting dirt, debris, and microscopic particles that would otherwise cause serious damage to your engine's internal components. As it traps these contaminants, the oil changes color — typically from an amber or light brown to a darker, almost black shade. What Makes Engine Oil Get Dirty? You might be wondering, how does engine oil get dirty? Here are several culprits: Combustion byproducts: Every time your engine runs, combustion gases can leak past the piston rings — a process called blow-by that introduces soot and other particles directly into your oil. Fuel contamination: Poor engine performance or worn piston rings can cause excessive fuel to mix with your oil, contributing to its degradation. Heat and wear: The extreme temperatures in your engine break down oil over time, causing it to collect more contaminants and lose its effectiveness. Signs Your Engine Oil Is Getting Dirty Is your oil crying out for help? Here are some telltale signs of bad engine oil: Darkening color from light amber to dark brown or black Gritty or sludgy texture when checking the dipstick Decreased engine performance Unusual engine noises Reduced fuel efficiency The Role of Your Oil Filter Your oil filter is the first line of defense against dirty oil. A clogged or inefficient filter can't trap particles, allowing contaminants to circulate freely in your engine. At Keith Pierson Toyota, we recommend regular filter changes as part of your routine maintenance. How a Bad Positive Crankcase Ventilation System Contributes to Dirty Oil The Positive Crankcase Ventilation (PCV) system is crucial in preventing oil contamination. When it's not working correctly, it can allow moisture, unburned fuel, and other contaminants to mix with your engine oil, accelerating the dirtying process. Protecting Your Engine: What You Can Do Don't worry, you're not powerless against dirty engine oil. Here are some pro tips: Schedule regular oil changes. Use high-quality motor oil recommended for your Toyota model. Have your PCV system checked during routine maintenance. Pay attention to your vehicle's performance and warning signs. Why Choose Keith Pierson Toyota for Your Oil Changes? We're not just another service center — we're your automotive partners. Our commitment goes far beyond a simple oil change. At Keith Pierson Toyota, you're getting more than a maintenance service; you're getting a comprehensive vehicle health check performed by true professionals who live and breathe Toyota engineering. Our certified technicians are trained directly by manufacturer experts to understand the intricate systems of every Toyota model. We don't believe in one-size-fits-all service. Each vehicle receives personalized attention, with our team carefully analyzing your specific model's requirements, driving conditions, and maintenance history. We use state-of-the-art diagnostic tools that interface directly with your Toyota's computer systems, allowing us to detect potential issues before they become costly problems. Our diagnostic process is so precise that we can identify subtle changes in engine performance that might go unnoticed by less specialized service centers. Every oil change at Keith Pierson Toyota includes genuine Toyota parts and premium-grade motor oils specifically formulated for your vehicle. We understand that your Toyota is an investment, and our goal is to help you maximize its performance, efficiency, and longevity. Our commitment extends beyond the service bay. We provide transparent consultations, detailed service reports, and ongoing maintenance recommendations tailored to your specific vehicle. At Keith Pierson Toyota, we'll treat your car as if it were our own. Ready To Give Your Engine Some Love? Don't let dirty engine oil compromise your vehicle's performance. Schedule an oil change appointment at Keith Pierson Toyota today. We're conveniently located in Jacksonville, Florida, and we're committed to keeping your Toyota in peak condition. man refilling motor oil on car engine bay by Tim Mossholder is licensed with Unsplash License